11nty Blog mit eigenem Html-Template
For a long time, I had the idea of setting up a blog. I decided to use the implementation of this project as my first blog post. I had the following requirements:
- No database
- No complicated, runtime-dependent programming languages
- The output should be a static page
A Google search for "static site generator 2021" led me to the following page:
Best Static Site Generators - TechRadar
At the top of the list was Hugo – a very fast generator based on Go. I had already tried Hugo. It is extremely fast and simple, as long as you use a pre-built template. However, if you want to create your own template, it becomes (at least in version 0.40 of Hugo) quite fiddly. I thought there must be an easier way.
Since I have a fondness for JavaScript, 11ty sounded very promising to me. It was supposed to be fast, simple, and work without frameworks like React or Angular. And lo and behold: it worked wonderfully.
Tech Stack:
Here are the steps I followed to set up this blog:
Create an HTML Template
- Basic HTML structure with:
- Menu
- Navigation
- Blog details
- Footer
- Basic HTML structure with:
Download 11ty Starter Blog from: Eleventy Base Blog GitHub
- Clone the starter template and install dependencies
- Understand the structure and adapt it
- Integrate your own template
Transfer the HTML Template to the starter template
Let's Get Started
Prerequisites
- Node.js and npm are installed
1. Create a Template
A classic HTML layout is quickly set up. To save time, I used the CSS framework Bulma and divided the template into the following parts:
- Navigation
- Content
- Sidebar
- Footer

Of course, other layouts and CSS frameworks are also suitable. I just wanted to try something other than Bootstrap.
2. Install 11ty Starter
At the link above, you can find the standard 11ty starter package. When you click the "Clone" button, you will get the Git URL.
# for SSH
git clone git@github.com:11ty/eleventy-base-blog.git my-new-blog

# or HTTPS
git clone https://github.com/11ty/eleventy-base-blog.git my-new-blog
Now, navigate to the folder and install the dependencies:
cd my-new-blog
npm install
Start 11ty Starter Blog
npm run server
# or
npx eleventy --serve
And you should see the following:
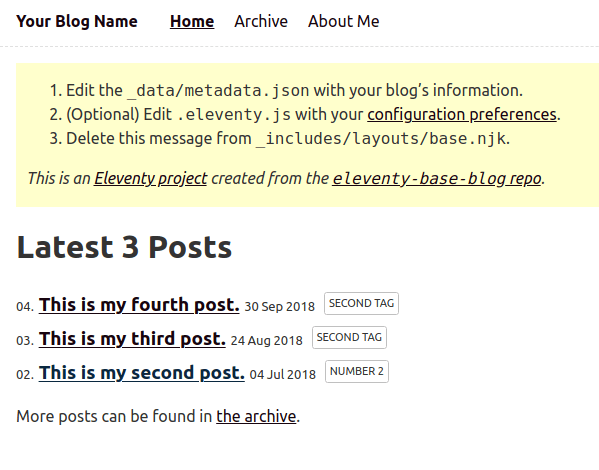
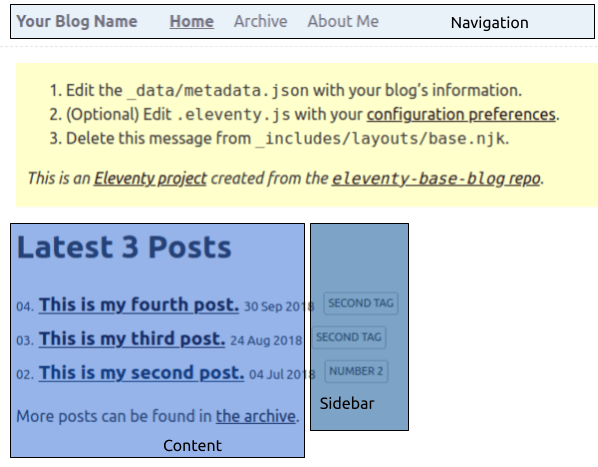
At first glance, you can see the dynamic elements that we need in our own template:
- Navigation: Menu items
- Content: Posts
- Sidebar: Tags
Structure and File Organization For better clarity, I organized some files into folders. CSS and JS were moved to the "Template" directory, content-specific files to the "Content" folder, and CI-specific files were deleted.

The files are divided into:
- ".njk" (Template),
- ".md" (Content/Posts),
- ".json" (Meta and Config),
- ".eleventy.js" (11ty Configuration).
Using Custom Template
Navigation:
- Create a new file under "_includes/layouts/navigation.njk".
- Copy the content of your navigation into this file.
- In the file "_includes/layouts/base.njk", you will find the page layout with the HTML structure. Lines 13–23 contain what we need. We extract
metadata.titleas the title for our blog and place the for-loop (lines 18–24) into our nav-container.
Before: 
After: 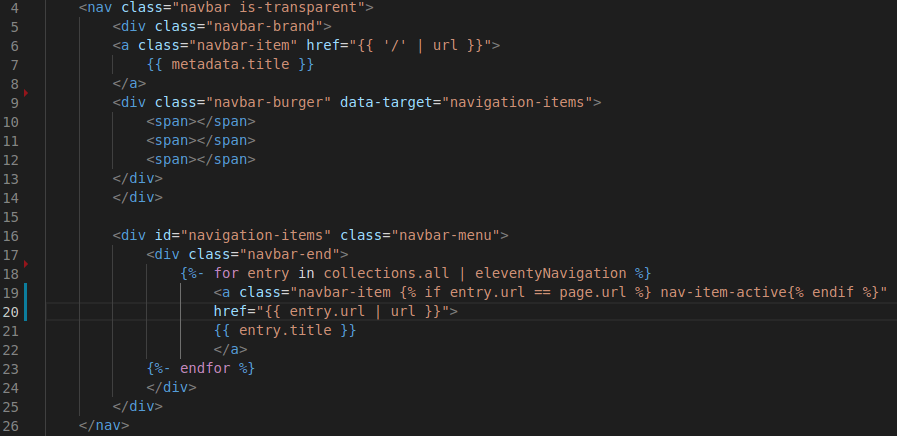
We move the for-loop into the container for navigation items. Next,
- we delete the content shown in the "Before" image from the "base.njk" file and replace it with
<div class="clear-image"></div>. The file should now look like this:

In addition to custom CSS files and the Bulma Burger Menu JavaScript, you can see the navigation and footer.
Content:
The content area varies depending on the page. On the main page, I want the sidebar to be visible, but not on the post detail pages. Therefore, the files /_includes/layouts/home.njk and postlist.njk are relevant for the main page, while post.njk is used for the detail page.
The starter template code has been connected to the custom template for the content area:
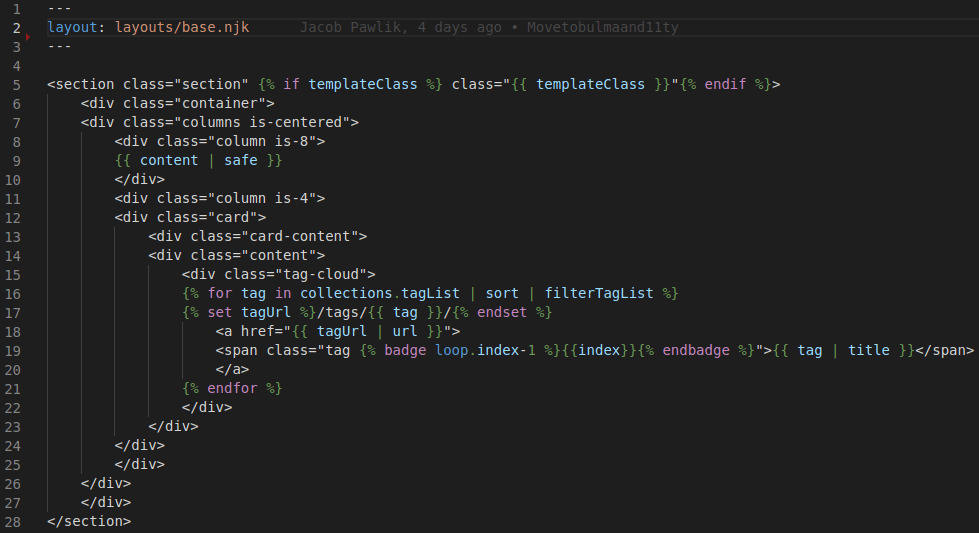
Alongside the copied standard code, in line 19, you can see a section where I map Bulma tag classes to tags based on the index to add some color to the content area. For this, I added a shortcode in the .eleventy.js file:
eleventyConfig.addPairedShortcode("badge", function (_, index) {
    const badge = [
        "is-black",
        "is-primary",
        "is-link",
        "is-success",
        "is-dark",
        "is-warning",
        "is-danger",
    ];
    return badge[index % badge.length];
});
The starter template code was also connected to the custom template for the detail area:
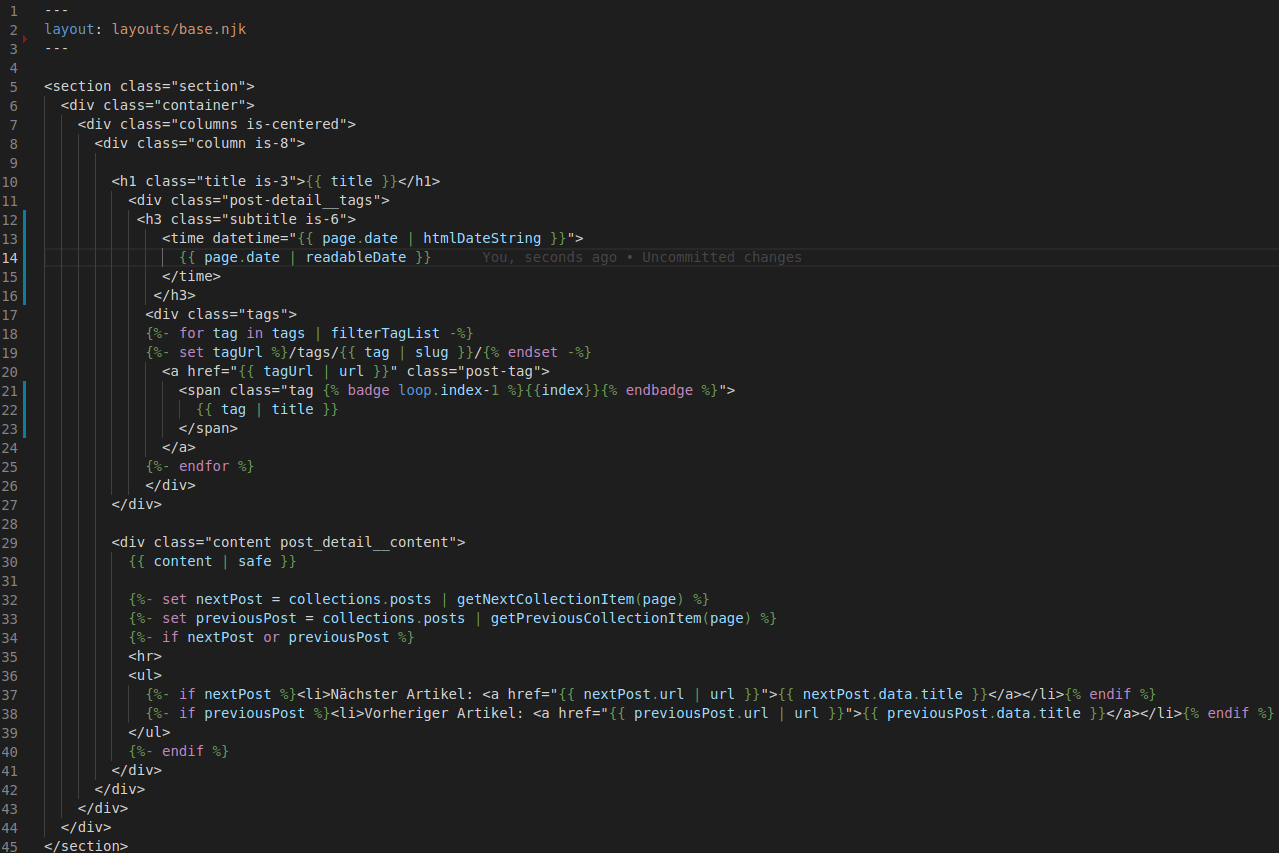
For the list of posts, the starter template code was connected to the custom template:
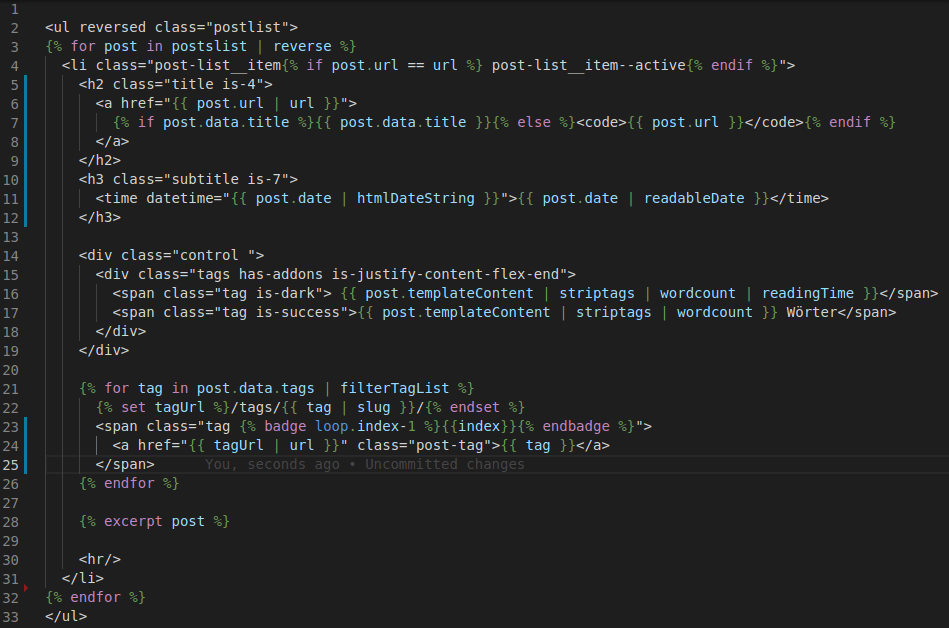
I also use a custom filter called "readingTime", which I took from the starter template Eleventy Chirpy Blog to display the estimated reading time.
To avoid manually typing the code, I have uploaded the relevant files on GitHub/derKuba.